From the outside, window tinting looks simple: lay the film, squeegee it flat, drive away. In reality, between "car arrives" and "keys returned" sits four to six hours of work and a dozen technical operations — skip any of them and within a week or two you get bubbles, edge lift or hazy streaks. This article walks through how window tinting actually works at a studio: intake, glass prep, film cutting, application itself, drying, and what you cannot do during the first three days. Along the way we cover what separates a proper studio from a street operation charging 50 ₾ per window in Tbilisi, Georgia.
Contents
- Intake and glass inspection
- Glass cleaning with isopropyl alcohol
- Film cutting — heat shrink or pre-cut template
- Application and squeegee work
- Drying for 3-7 days and the final check
- What you cannot do for the first 3 days
- FAQ
- Conclusion
Intake and glass inspection
Any proper window tinting process starts not with the film but with the glass. The technician inspects every window for chips, scratches, factory coating defects, and remnants of old film or adhesive. Everything goes into the order card — if a customer later says "you scratched my glass", there is a "before" photo to reference.
The same step covers film colour and percentage choice, plus a tint-meter reading of the factory VLT (always under 100% — typically 80-85%) and the calculated post-install figure. If the goal is passing inspection on the windshield, the chosen film must combine with the glass to keep total VLT no lower than the 70% required by Georgian law.
If old film is already on the glass, it has to come off first. That is a separate procedure priced at intake — see the article on old tint removal for details. Removed film never goes back on the glass, and adhesive is fully stripped with solvent. Without that step, new film lies on top of old adhesive residue and creates wave patterns within two or three days.
Glass cleaning with isopropyl alcohol
The glass that will receive the film has to be sterile-clean. Any speck of dust, hair or water droplet between film and glass becomes a permanent visible defect — a dot invisible from outside but obvious from inside on every sunny day.
Standard cleaning procedure at a studio:
- Glass washed inside and out with regular glass cleaner.
- Then isopropyl alcohol 70-99% with lint-free microfibre. Isopropyl degreases the surface and evaporates without residue.
- Final pass with a rubber squeegee to clear any remaining water and confirm not a single dot was missed.
In parallel, the technician handles the rubber seal around the glass — pulls it back and blows compressed air through. Without this, road dust from the seal gets pulled under the film during application and turns into black specks along the edge within a week.
Street operators usually skip the isopropyl step, washing only with soapy water. Within 7-10 days the customer comes back complaining about "bubbles" — but those are not bubbles, they are dust and grease left between film and glass.
Film cutting — heat shrink or pre-cut template
Film comes on a roll, while car glass has complex geometry — especially the rear window, almost always curved in two planes. Eyeballing the cut is not feasible: film either overlaps or falls 2-3 mm short of the edge.
Two working methods:
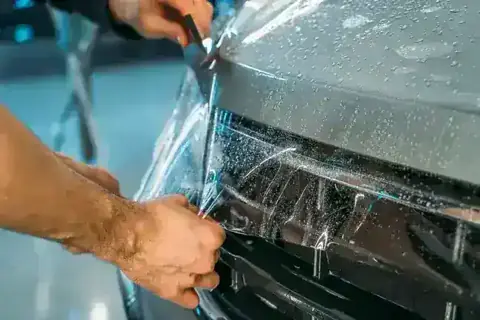
Heat shrink camera. Film is laid on the outside of the glass adhesive-side up (protective liner still attached), heated with a hot-air gun to 60-80°C and shaped to the glass geometry. After cooling it holds the shape. The film is then peeled off, transferred to the inside, and installed already pre-formed.
Pre-cut template. For popular car models, a studio has a library of pre-cut templates — Toyota Camry, Hyundai Tucson, Lexus RX and so on. Film is plotter-cut to the millimetre. Faster, but only works if the model is in the database.
BESTAUTO works with both methods — heat-shrink for rare cars, pre-cut templates for common ones. Street operators usually skip both: film is cut directly on the glass with a utility knife on the car. After such a cut, micro-chips appear along the glass edge, and within a year the film starts lifting from spots where the blade nicked the protective layer.
Application and squeegee work
Once the film is cut, application begins. Glass is sprayed with a slip solution — water with a couple of drops of soap-free detergent that lets the film slide on the glass until it sits in final position. Without slip solution the film grips on first contact.
The protective liner is peeled off the adhesive side in one motion, the film transferred to the glass adhesive-down and aligned. The technician slides it into position with 1-2 mm gaps from the rubber seals — never flush, otherwise film contracts in the first hours and creeps onto the rubber.
Then the squeegee work. A plastic or rubber blade pushes water and air bubbles out from under the film in one direction: from centre to edges. Four to six passes, each with more pressure. Final step is heating the film with a heat gun to 60-80°C so the adhesive activates and locks to the glass.
Side windows are usually lowered 2-3 cm during install so the film can be tucked under the upper rubber seal. Without this step the upper edge sticks out above the glass, and lowering or raising the window catches it on the rubber — edge lift appears within a week.
Drying for 3-7 days and the final check
A thin water layer always remains between film and glass after even the most careful squeegee work. That layer evaporates through the film itself and via the edges — this process is called the cure and runs 3 to 7 days depending on temperature.
In the first 24 hours small water bubbles are visible on the film — normal. Most disappear within 2-3 days, residual ones go within a week to a week and a half. If bubbles remain after 3 weeks, it is air rather than water, and the film was installed defectively — it needs redoing.
Tbilisi summers with the studio at 25-30°C dry the film fast: 3-4 days and it is done. Winter at 10-15°C stretches the cure to 7-10 days. Heating cannot accelerate drying — high temperature only damages the adhesive without speeding evaporation.
After 5-7 days the technician invites the customer back for a free check: edges, absence of bubbles and lift, correct window-lift operation. Anything off — redone under warranty. LLumar and LuxArmor films at BESTAUTO carry the manufacturer warranty of 5-10 years depending on line.
What you cannot do for the first 3 days after tinting
The most common customer mistakes after install — because nobody explained.
Do not lower the windows. Side windows must stay up for at least 3 days, ideally 5. The film has not fully bonded to the adhesive yet, and lowering catches the upper edge on the seal and lifts it. If absolutely necessary — drop 1-2 cm for a minute, vent, raise back.
Do not stick anything to the film. Parking permits, stickers, badges — nothing on fresh film. Sticker adhesive bonds to the film surface and leaves a mark when removed. In two weeks — fine; right now — no.
Do not wash the car exterior. Glass outside is fine, the film is inside. But automated washes with active foam and brushes — wait 5 days. High-pressure water can shift film at the edges before it has fully bonded.
Do not chase water bubbles for the first 2 weeks. Do not pierce them with a pin and do not push them out by hand — just wait. If they remain after 3 weeks — call the studio.
FAQ
How long does car window tinting take?
A full five-window install (4 sides + rear) — 3-4 hours at a proper studio. Adding the windshield — another 1-1.5 hours, since the windshield is harder: more area and double-curved geometry. Exact time depends on car model and rear-window complexity. Drying happens after install — no need to wait at the studio.
Can window tinting be done on the same day as other work?
Yes, if the other work is unrelated to the glass. Body polishing, ceramic coating, washing — fine, runs in parallel. But windshield replacement or seal repair — no, not the same day: after that work the glass needs time to settle, and window tint will sit crooked.
How does a studio process differ from a street operator?
Three things. Clean booth with air filtration (no dust between film and glass). Isopropyl glass treatment (full degreasing before application). Heat-shrink camera for complex windows (film pre-formed before install). A street operator skips all three — hence bubbles and edge lift within a week.
What if bubbles appear after a month?
Call the studio immediately. If under warranty and the film is LLumar or LuxArmor — redone for free. Do not pierce bubbles yourself with a needle — that destroys the adhesive layer and the entire film has to come off, not just be re-applied. The most common case is edge bubbles, meaning the upper seal was poorly handled or the glass was not fully degreased.
Can tinting be done in rain or in winter?
Winter — yes, in a heated booth. Direct rain — better not, not because of water outside but because of high indoor humidity. Above 70% humidity drying slows down and the risk of residual bubbles rises. A proper studio runs a dehumidifier — that solves it.
Conclusion
The window tinting process is a dozen technical steps, and skipping any of them costs the customer a redo within a month. A studio process differs from a street one by three key stages: clean booth with air filtration, isopropyl glass prep, heat-shrink film forming before install. Cure after install is 3-7 days; for the first 3 days no lowering windows, no stickers on the film, no aggressive brushing washes.
At BESTAUTO we work only with LLumar and LuxArmor films under manufacturer warranty of 5-10 years. Tinting prices: rear sides from 130 ₾, rear window from 160 ₾, windshield from 290 ₾. Final figure set at intake based on car model and film type.
Key takeaways:
- The window tinting process runs 4-6 hours at the studio plus 3-7 days of cure
- Isopropyl glass cleaning and a clean booth are the critical steps
- Heat-shrink forming is needed for rare cars with curved windows
- For the first 3 days — no lowering windows, no stickers, no aggressive washing
- A 5-7 day check-back is standard at a proper studio
Book window tinting at BESTAUTO via the form on the service page or by calling whichever studio is more convenient in Tbilisi, Georgia:
- BESTAUTO Guramishvili — Guramishvili Ave. 78, tel. +995 550 000 299
- BESTAUTO Politkovskaya — Anna Politkovskaya St. 51, tel. +995 550 000 199
Both studios are open Monday to Saturday, 10:00–20:00. Before installation — a free consultation on film choice and a tint-meter reading on your glass.